
25-minute makeup recipe
Elongated Eye Makeup for Round Eyes
Pull mid-tone shadow outward from the outer iris, keep the inner lid bright, and place mascara toward the outer lashes to create length.

Before you start4 tools3 shadesPrep settled
Color and product roles
The look recipe
Match each function with products you already own before shopping.
Mid taupe
elongating transition. Place it outer half and slightly beyond corner.
Soft bronze
lid dimension. Place it center to outer lid.
Deep brown
lash depth. Place it outer upper and lower lashes.
What makes this look work
- Mid taupe is kept at outer half and slightly beyond corner, so its elongating transition role stays readable instead of spreading across the look.
- Soft bronze supplies the focal contrast at center to outer lid while the surrounding edges remain controlled for a soft matte result.
- Prominent eyes changes the placement rather than the whole palette: use matte bronze instead of high shine on the center lid.
- The final check prioritizes create horizontal length on round eyes without a sharp graphic wing, not a heavier layer of every product.
Intent check
How to decide if Elongated Eye Makeup for Round Eyes is the right tutorial
Elongated Eye Makeup for Round Eyes is a 25-minute intermediate recipe for evening and date night. It is built around a specific job: create horizontal length on round eyes without a sharp graphic wing. The editorial lens for this page is open-eye visibility, endpoint direction, and how much lid space remains visible, so the steps explain when to keep the product sheer, when to build depth, and when to stop correcting before the makeup becomes heavier than the intended soft matte finish.
Choose it for evening and date night
This tutorial fits readers who want pull mid-tone shadow outward from the outer iris, keep the inner lid bright, and place mascara toward the outer lashes to create length. It is less useful if you want a completely different focal point, because the sequence protects Mid taupe at outer half and slightly beyond corner and uses the remaining steps to support that choice instead of turning the page into a generic full-face routine. Because the routine sits in the middle timing range, the page balances visible definition with enough restraint for normal conversation distance.
Color logic: Mid taupe, Soft bronze, and Deep brown
Mid taupe carries the elongating transition role at outer half and slightly beyond corner, while Soft bronze creates the visible contrast at center to outer lid. Deep brown then ties the face back to the same color story at outer upper and lower lashes. If one shade is swapped, keep the same depth relationship before changing the undertone; otherwise the look can lose the clear soft matte read that makes Elongated Eye Makeup for Round Eyes distinct.
Open-eye and skin-depth adjustment
Prominent eyes should start with this placement change: Use matte bronze instead of high shine on the center lid. The reason is simple: a matte surface creates length without adding roundness. For Downturned round eyes, the more important edit is lift the endpoint before the natural corner drops. This keeps the tutorial useful across round eye shapes and fair, light, medium, and deep skin depths without rewriting the whole palette.
Round-eye priority: length before height
Round eyes usually need horizontal pull more than extra vertical depth. This tutorial keeps the center from becoming too tall, extends structure outward, and makes the outer lash line the directional anchor. If the eye looks larger but not more elongated, reduce lower-lash darkness and move the endpoint outward in small strokes. The finished shape should feel softly stretched, not sharply boxed.
What to check before adding more product
The first checkpoint is whether Mid taupe still sits where the page promised: outer half and slightly beyond corner. The second is whether Soft bronze remains visible at center to outer lid without spreading into the area reserved for structure or skin texture. The third is whether the correction for Deep skin is still present after blending: use rich cocoa and copper-brown instead of pale taupe. If those checks pass, extra product is more likely to create noise than improvement.
Failure signal and fastest fix
The most likely failure point is "The eye looks rounder" because dark color circles the entire lash line. Fix it by doing this first: Remove inner lower shadow and focus definition from the outer iris outward. If the next visible issue is "The wing looks disconnected," use the same rule: correct the cause, not the whole face. That cause is the endpoint starts after a gap at the lash line. and the focused repair is build from between the outer lashes before extending.
When to stop the tutorial
Stop when the result matches the page goal rather than when every product has been intensified. For Elongated Eye Makeup for Round Eyes, that means the soft matte finish still looks intentional, the smudgeable deep brown pencil role has been handled, and the final visible problem is no longer "Both ends look heavy." If that problem appears, the likely cause is the inner corner was darkened to match the outer corner. so the best next move is brighten the inner third and keep weight only at the outer edge.
Use what you own
Tools and prep
Clean complexion sponge or fingertips
Keep the soft matte base for Elongated Eye Makeup for Round Eyes thin and localized instead of masking the whole face.
Substitute: A small, clean synthetic complexion brush
Small tapered blending brush
Control mid taupe precisely at outer half and slightly beyond corner without spreading the edge too far.
Substitute: A clean small crease brush
Short dense detail brush
Place definition in short strokes so the Elongated Eye Makeup for Round Eyes shape stays deliberate at close distance.
Substitute: The clean edge of a small flat brush
Clean spoolie or lash comb
Separate brow and lash hairs before the final soft matte checkpoint for this tutorial.
Substitute: A washed mascara wand reserved for grooming
Prep check
- Prime the outer eye and set only the inner half with a small amount of powder.
- Set out the tools for Elongated Eye Makeup for Round Eyes before starting so the soft matte layers can be placed without a long pause.
- Check outer half and slightly beyond corner in front-facing daylight and keep the first application lighter than the final target.
Follow the steps
0 of 8 complete
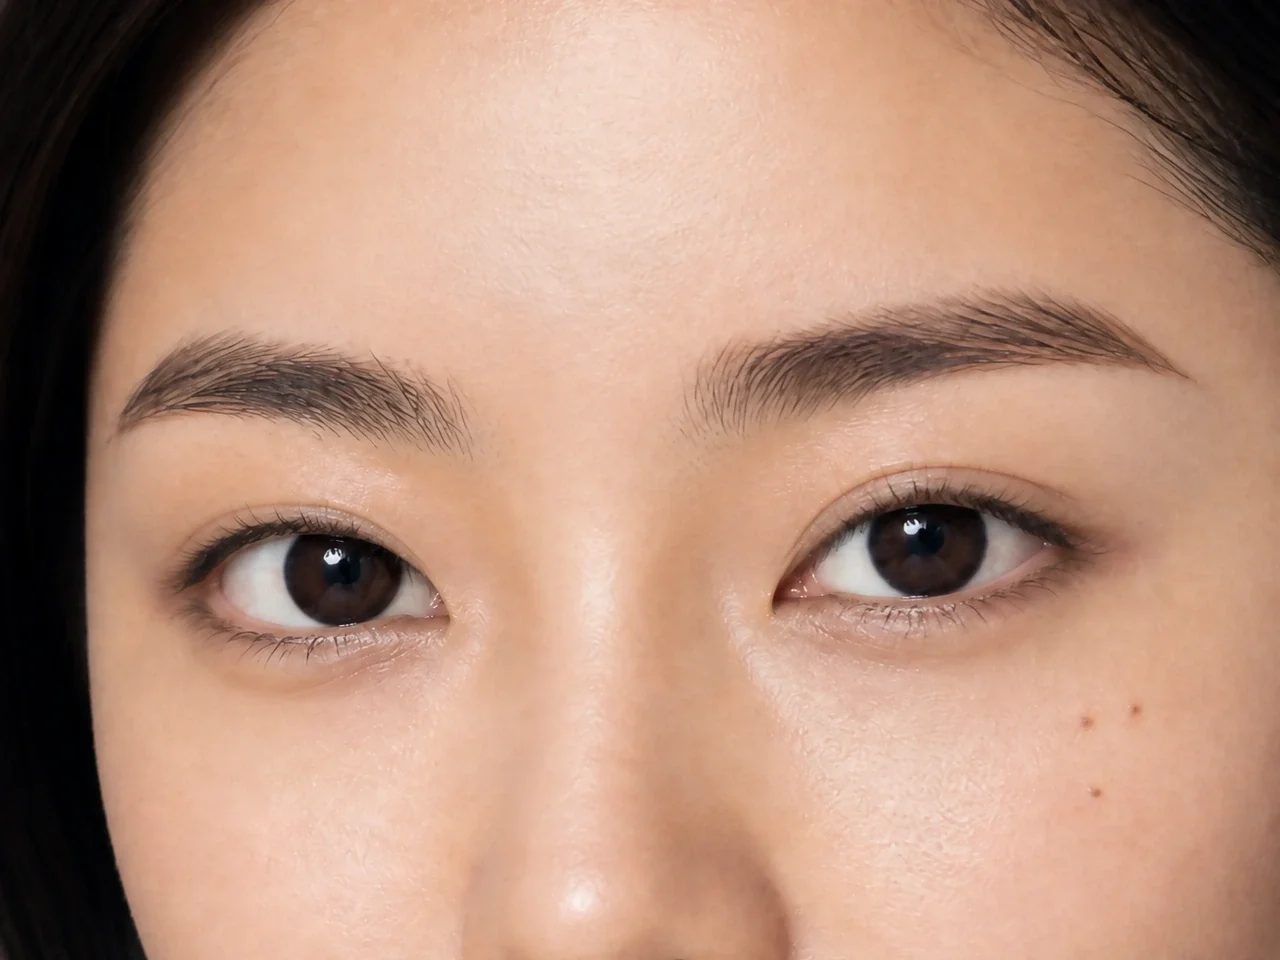
Visual checkpoint for Elongated Eye Makeup for Round Eyes: The lids feel smooth and dry while the natural fold and open-eye landmarks remain easy to see. Observe the named area before continuing. Step 1 of 8
Prime the visible lid area
Prime the outer eye and set only the inner half with a small amount of powder.
- Both eyes
- Fingertip
Done when: The lids feel smooth and dry while the natural fold and open-eye landmarks remain easy to see.
More tips
Target result: The lids feel smooth and dry while the natural fold and open-eye landmarks remain easy to see.
- Tool
- Clean fingertip or flat synthetic brush
- Product role
- thin eye base for the soft matte finish
- Placement
- From the upper lash roots across the mobile lid and just beyond the visible fold, stopping below the brow bone
- Motion
- Press a thin film outward, then tap over any crease instead of rubbing back and forth
- Amount
- One rice-grain amount divided between both lids for Elongated Eye Makeup for Round Eyes
- Working time
Why this works: Keeping thin eye base for the soft matte finish at From the upper lash roots across the mobile lid and just beyond the visible fold, stopping below the brow bone directly supports this tutorial goal: create horizontal length on round eyes without a sharp graphic wing.
If it looks wrong: Remove inner lower shadow and focus definition from the outer iris outward.
View full-size image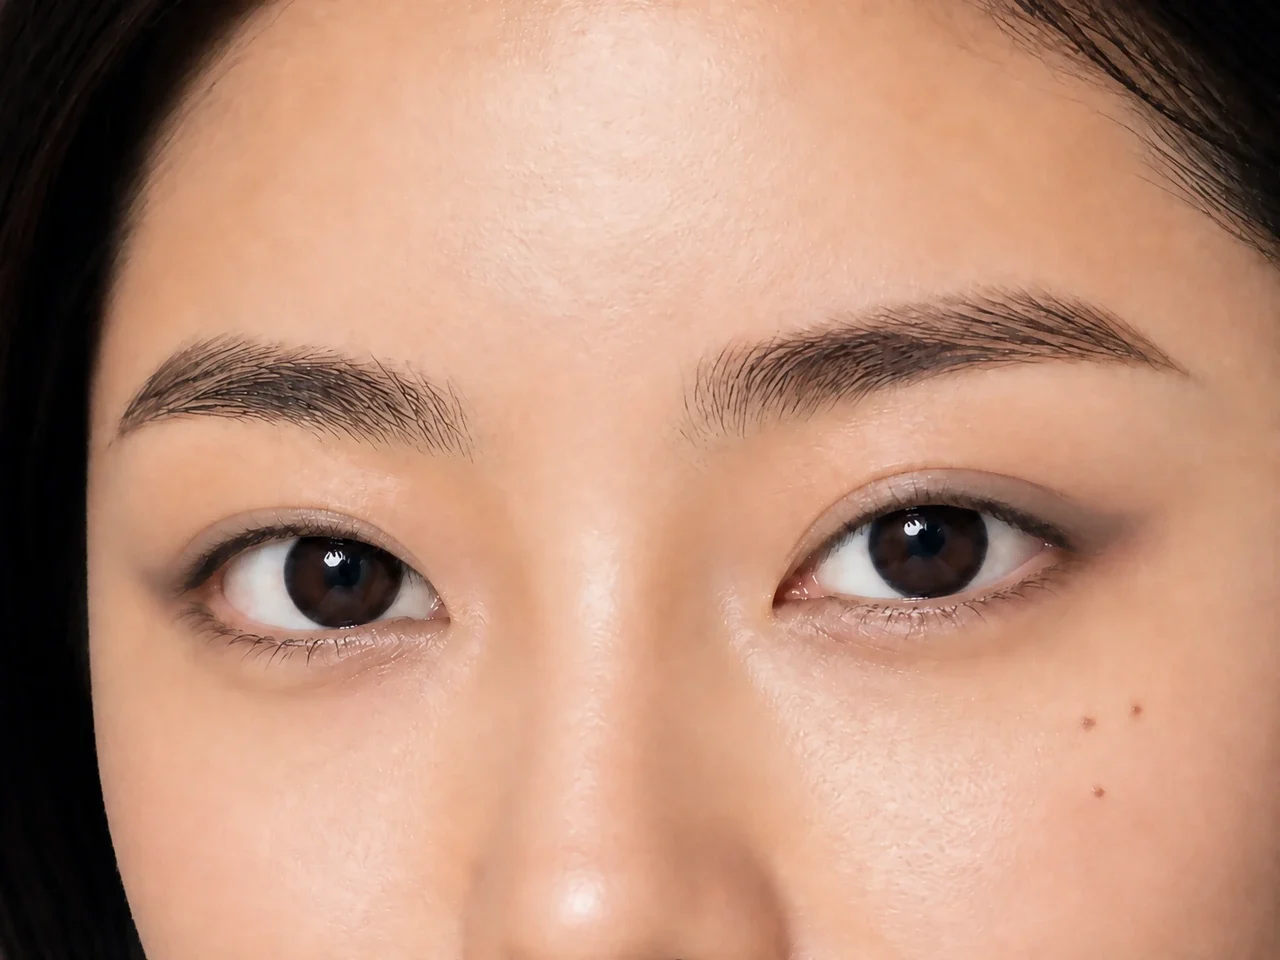
Visual checkpoint for Elongated Eye Makeup for Round Eyes: Mid taupe creates a soft guide at outer half and slightly beyond corner that remains visible with a relaxed gaze. Observe the named area before continuing. Step 2 of 8
Map mid taupe with the eyes open
Look straight ahead, mark outer half and slightly beyond corner, and connect the guide with short strokes.
- Both eyes
- Blending brush
Done when: Mid taupe creates a soft guide at outer half and slightly beyond corner that remains visible with a relaxed gaze.
More tips
Target result: Mid taupe creates a soft guide at outer half and slightly beyond corner that remains visible with a relaxed gaze.
- Tool
- Small tapered blending brush
- Product role
- Mid taupe: elongating transition
- Placement
- outer half and slightly beyond corner, using the brow tail and outer lash line as direction references
- Motion
- Short outward strokes followed by tiny circles only along the upper edge
- Amount
- One light pickup of Mid taupe, tapped off before the brush reaches the lid
- Working time
Why this works: Keeping mid taupe: elongating transition at outer half and slightly beyond corner, using the brow tail and outer lash line as direction references directly supports this tutorial goal: create horizontal length on round eyes without a sharp graphic wing.
If it looks wrong: Build from between the outer lashes before extending.
View full-size image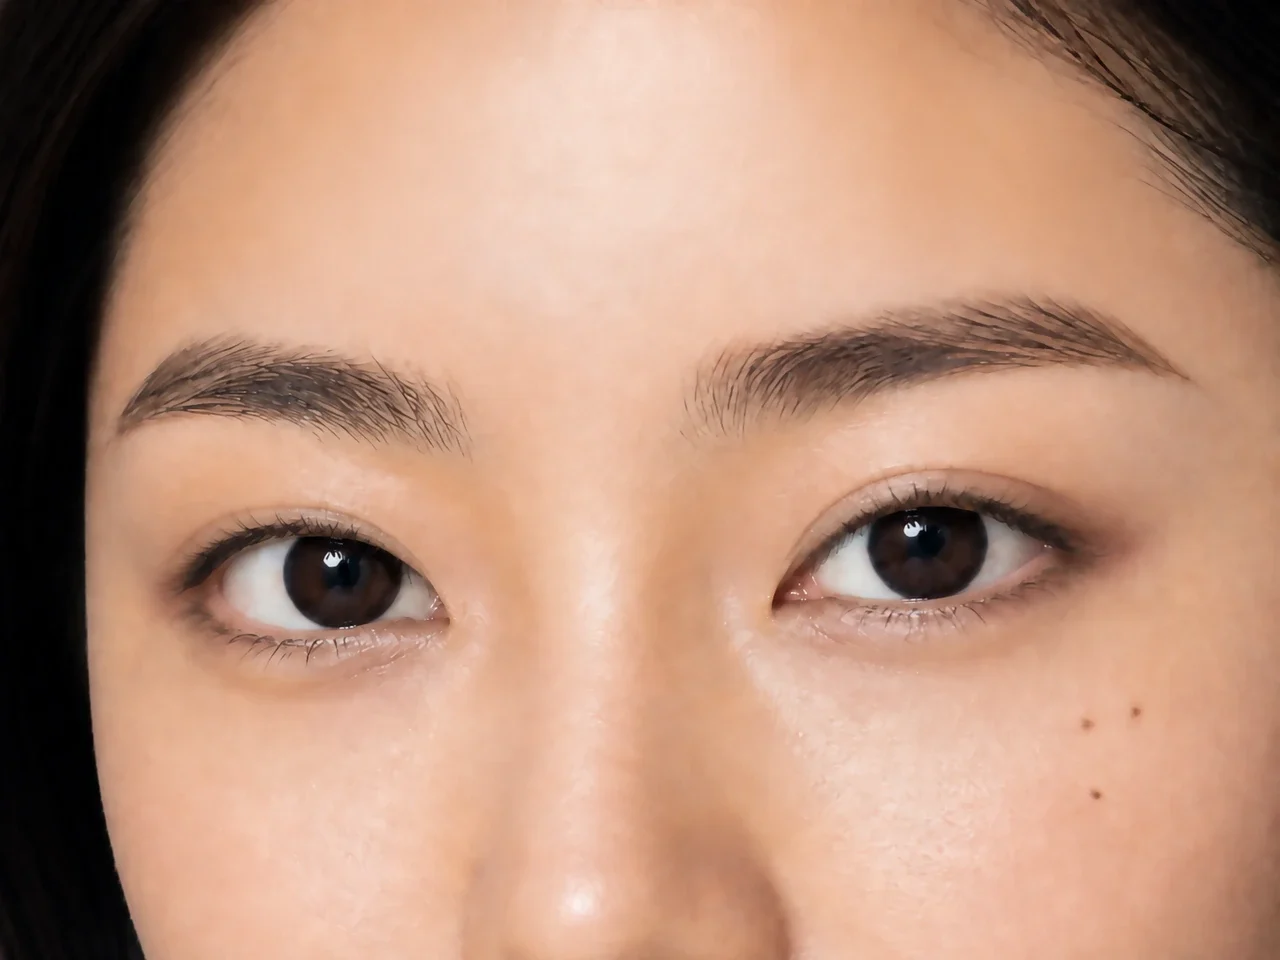
Visual checkpoint for Elongated Eye Makeup for Round Eyes: The outer structure is slightly deeper than the transition while the center lid remains available for the focal shade. Observe the named area before continuing. Step 3 of 8
Build the open-eye structure
Add depth only where the guide already exists, then soften the edge upward rather than dragging it toward the temple.
- Lids
- Blending brush
Done when: The outer structure is slightly deeper than the transition while the center lid remains available for the focal shade.
More tips
Target result: The outer structure is slightly deeper than the transition while the center lid remains available for the focal shade.
- Tool
- Small tapered blending brush with most product removed
- Product role
- Mid taupe: elongating transition
- Placement
- The outer third of outer half and slightly beyond corner, ending before the brow bone or natural downturn
- Motion
- Compact upward circles and short strokes that return toward the center
- Amount
- Half the amount used in the mapping step, concentrated at the outer third
- Working time
Why this works: Keeping mid taupe: elongating transition at The outer third of outer half and slightly beyond corner, ending before the brow bone or natural downturn directly supports this tutorial goal: create horizontal length on round eyes without a sharp graphic wing.
If it looks wrong: Brighten the inner third and keep weight only at the outer edge.
View full-size image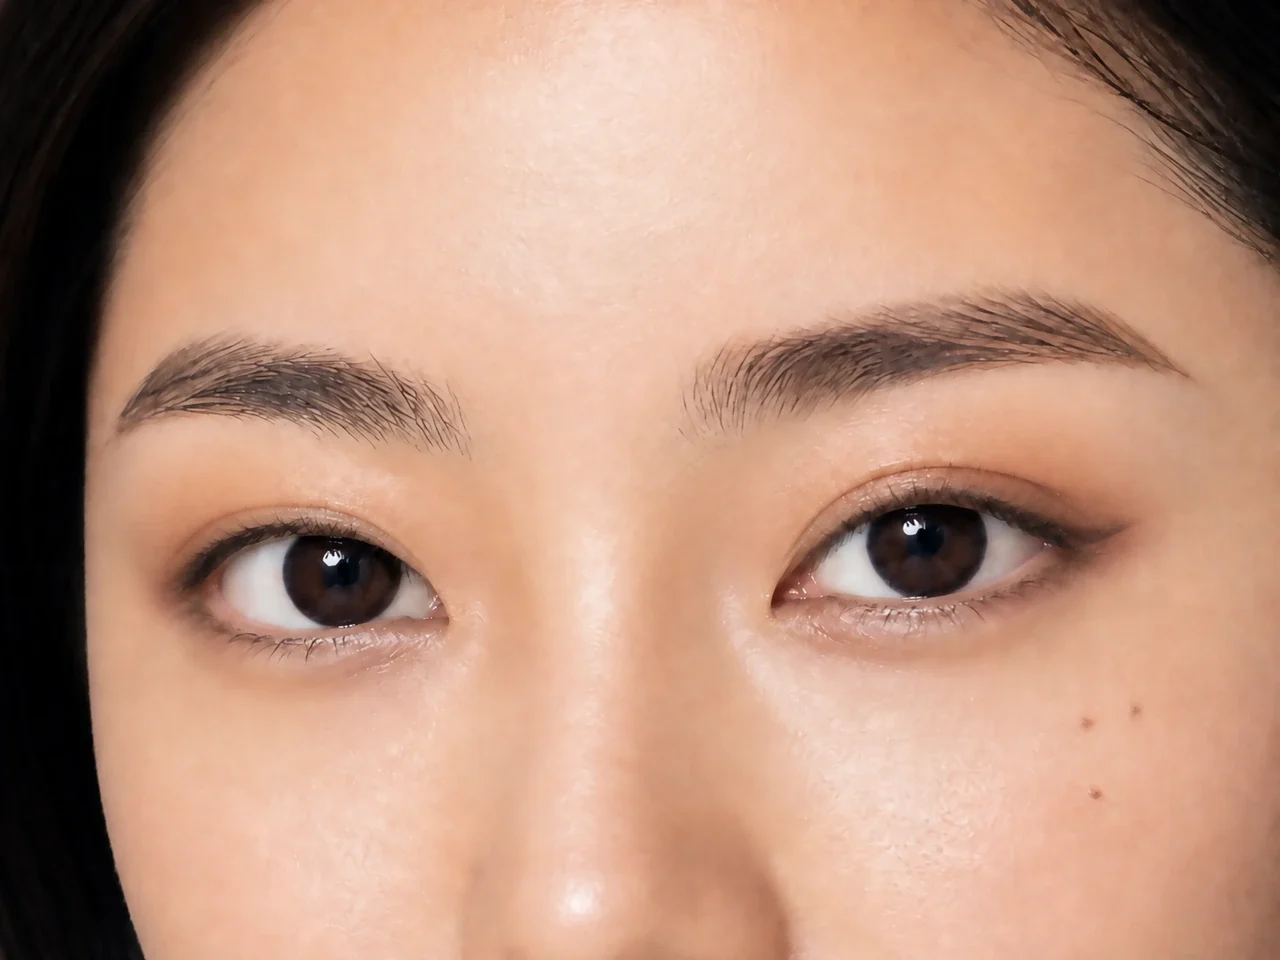
Visual checkpoint for Elongated Eye Makeup for Round Eyes: Soft bronze is clearly visible at center to outer lid while the transition border stays intact. Observe the named area before continuing. Step 4 of 8
Press in soft bronze
Press soft bronze onto center to outer lid in small sections.
- Lids
- Shader brush
Done when: Soft bronze is clearly visible at center to outer lid while the transition border stays intact.
More tips
Target result: Soft bronze is clearly visible at center to outer lid while the transition border stays intact.
- Tool
- Small flat shader brush or clean fingertip
- Product role
- Soft bronze: lid dimension
- Placement
- center to outer lid, kept below the upper transition boundary
- Motion
- Firm taps for deposit, followed by one light sweep only where the shades meet
- Amount
- One controlled pickup of Soft bronze; add a second only where the lid still looks bare
- Working time
Why this works: Keeping soft bronze: lid dimension at center to outer lid, kept below the upper transition boundary directly supports this tutorial goal: create horizontal length on round eyes without a sharp graphic wing.
If it looks wrong: Remove inner lower shadow and focus definition from the outer iris outward.
View full-size image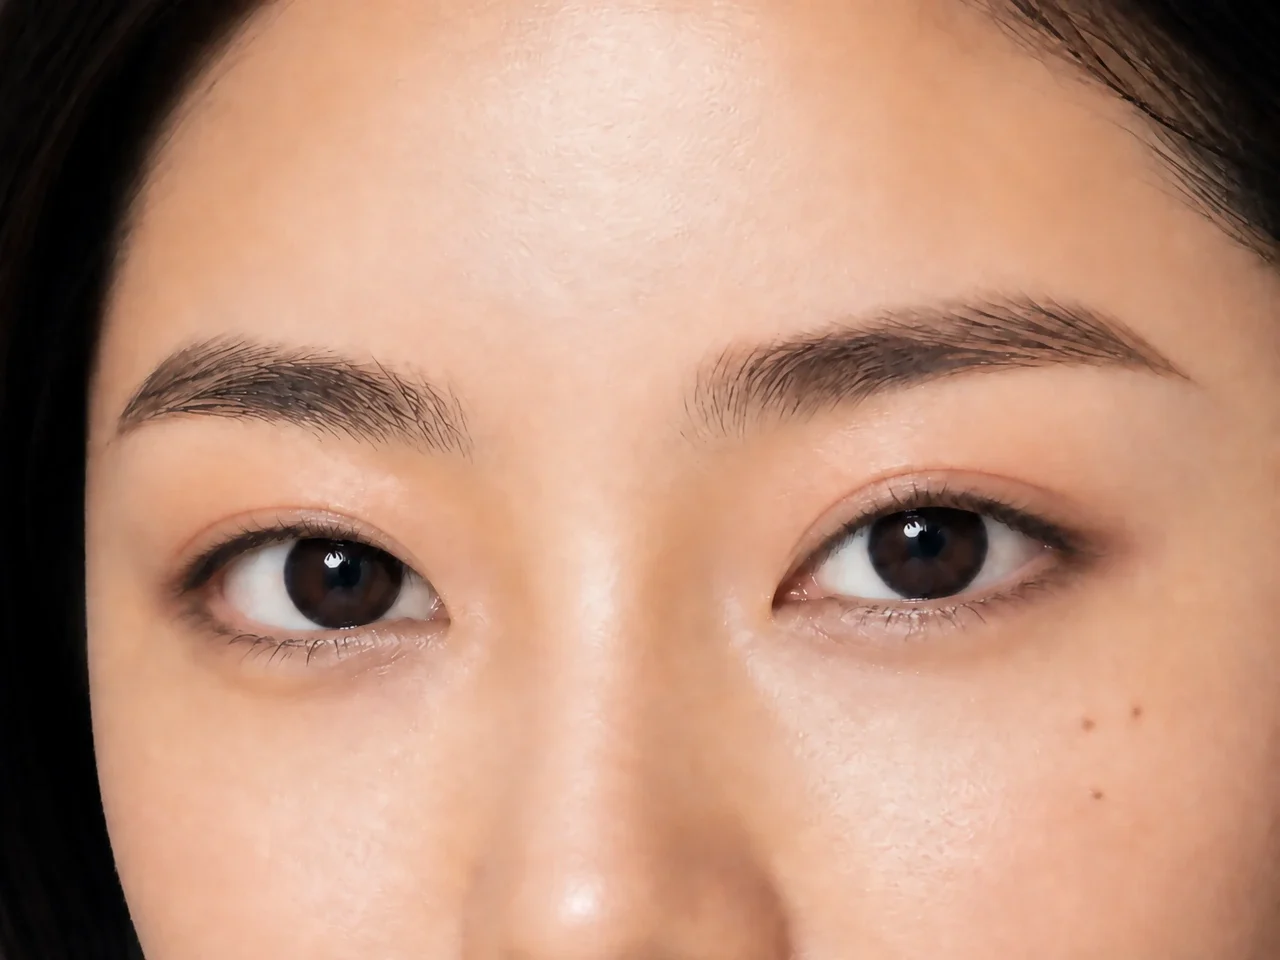
Visual checkpoint for Elongated Eye Makeup for Round Eyes: Deep brown makes the upper lashes look denser without hiding the focal lid shade. Observe the named area before continuing. Step 5 of 8
Define the upper lash roots
Smudge deep brown from the outer iris to a lifted endpoint just beyond the corner.
- Lash line
- Liner brush
Done when: Deep brown makes the upper lashes look denser without hiding the focal lid shade.
More tips
Target result: Deep brown makes the upper lashes look denser without hiding the focal lid shade.
- Tool
- Short dense liner brush or precise pencil
- Product role
- Deep brown: upper-lash definition only
- Placement
- Between and immediately above the upper lash roots, stopping at the endpoint guided by the open-eye shape
- Motion
- Stamp between lash roots, then use one short outward stroke at the endpoint
- Amount
- The thinnest visible deposit of Deep brown, deepest only where the recipe needs lift
- Working time
Why this works: Keeping deep brown: upper-lash definition only at Between and immediately above the upper lash roots, stopping at the endpoint guided by the open-eye shape directly supports this tutorial goal: create horizontal length on round eyes without a sharp graphic wing.
If it looks wrong: Build from between the outer lashes before extending.
View full-size image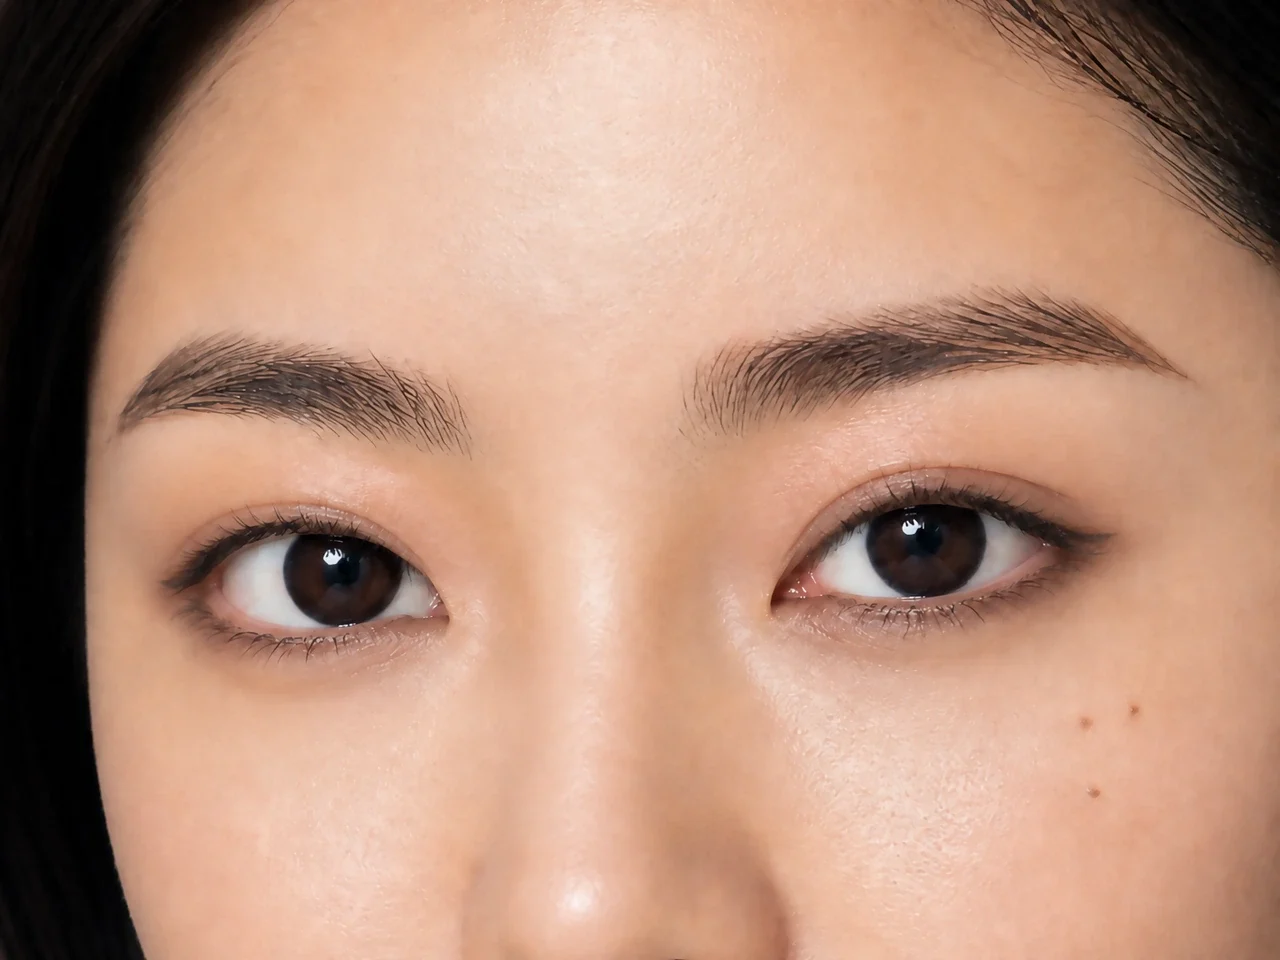
Visual checkpoint for Elongated Eye Makeup for Round Eyes: A restrained lower-lash echo connects the palette without closing the inner corner or pulling the eye down. Observe the named area before continuing. Step 6 of 8
Balance the lower lash line
Use the residue of mid taupe along the outer lower lashes, then fade it before the inner half.
- Lower lash
- Detail brush
Done when: A restrained lower-lash echo connects the palette without closing the inner corner or pulling the eye down.
More tips
Target result: A restrained lower-lash echo connects the palette without closing the inner corner or pulling the eye down.
- Tool
- Clean short detail brush
- Product role
- Mid taupe: elongating transition
- Placement
- The outer third of the lower lash line, stopping before the inner half and below the lifted endpoint
- Motion
- Short inward strokes with the brush held parallel to the lower lashes
- Amount
- Only the residue left after the upper-eye steps; do not take a full new pickup
- Working time
Why this works: Keeping mid taupe: elongating transition at The outer third of the lower lash line, stopping before the inner half and below the lifted endpoint directly supports this tutorial goal: create horizontal length on round eyes without a sharp graphic wing.
If it looks wrong: Brighten the inner third and keep weight only at the outer edge.
View full-size image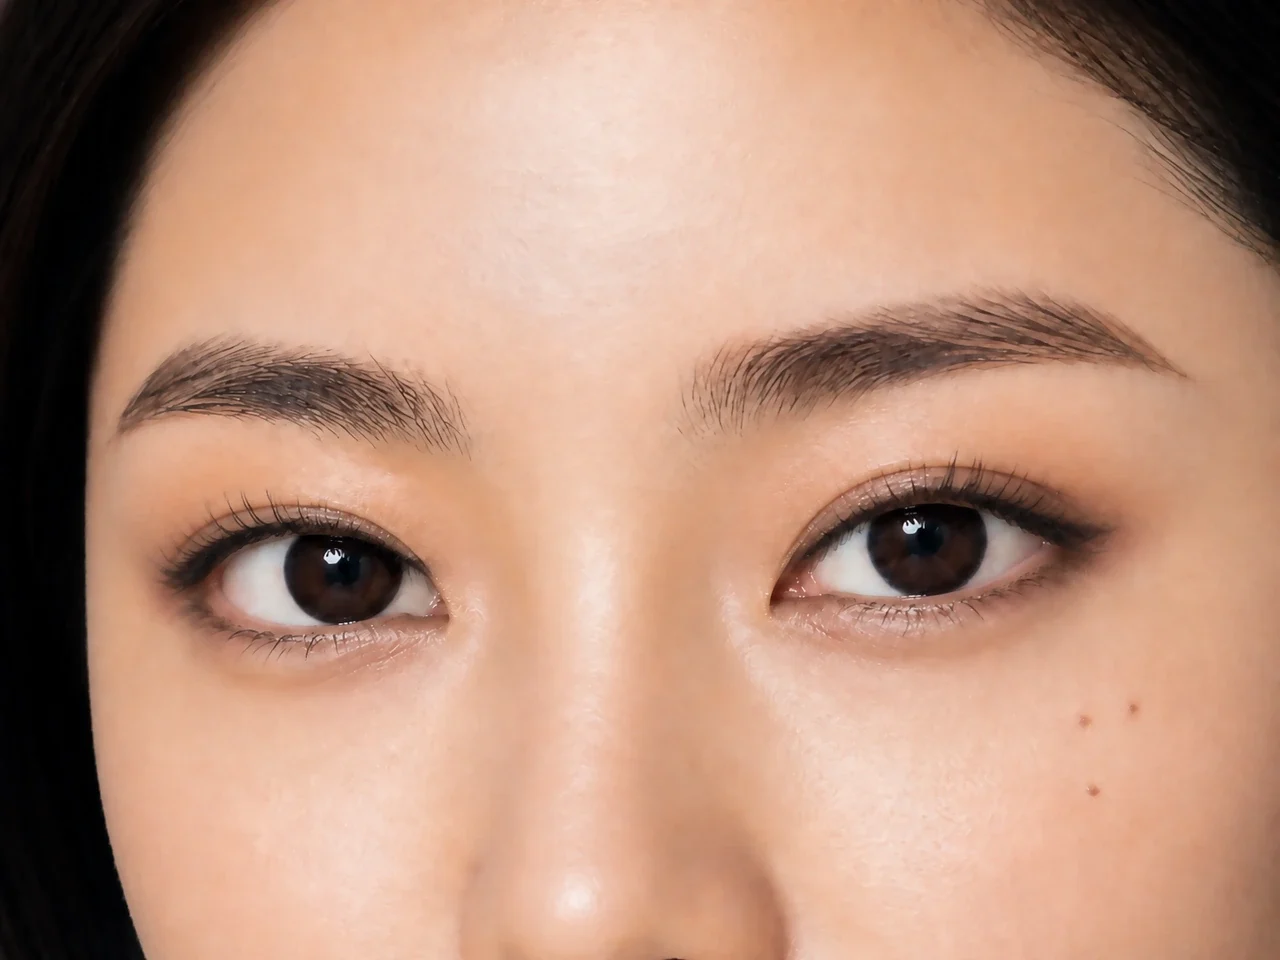
Visual checkpoint for Elongated Eye Makeup for Round Eyes: The center and outer lashes lift clear of the lid and remain individually separated. Observe the named area before continuing. Step 7 of 8
Curl and separate the lashes
Curl at the root without pulling, then comb mascara from the base upward.
- Lash line
- Lash curler
Done when: The center and outer lashes lift clear of the lid and remain individually separated.
More tips
Target result: The center and outer lashes lift clear of the lid and remain individually separated.
- Tool
- Lash curler and clean lash comb
- Product role
- lightweight separating mascara for Elongated Eye Makeup for Round Eyes
- Placement
- Upper lashes, with the strongest lift at the center and the recipe-specific outer section
- Motion
- One root press with the curler, then slow upward combing without repeated pumping
- Amount
- One thin mascara coat, followed by a partial second pass only where more lift is needed
- Working time
Why this works: Keeping lightweight separating mascara for Elongated Eye Makeup for Round Eyes at Upper lashes, with the strongest lift at the center and the recipe-specific outer section directly supports this tutorial goal: create horizontal length on round eyes without a sharp graphic wing.
If it looks wrong: Remove inner lower shadow and focus definition from the outer iris outward.
View full-size image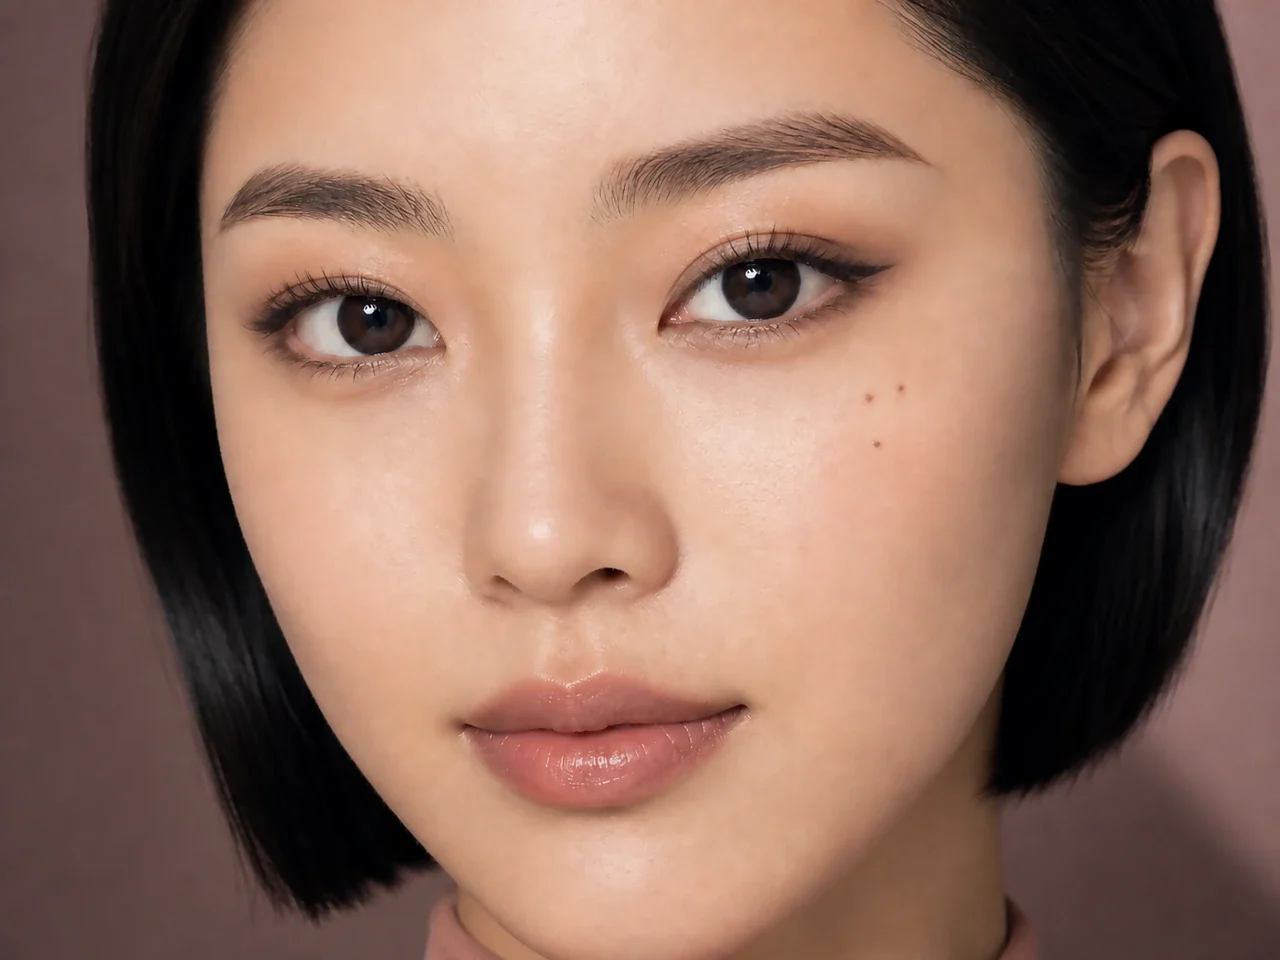
Visual checkpoint for Elongated Eye Makeup for Round Eyes: The soft matte eye reads evenly from straight ahead and every focal area remains visible with a relaxed gaze. Observe the named area before continuing. Step 8 of 8
Check the finished open-eye balance
Angle outer lashes sideways with mascara and leave the inner lower lash line clean.
- Full look
- Blending brush
Done when: Pull mid-tone shadow outward from the outer iris, keep the inner lid bright, and place mascara toward the outer lashes to create length.
More tips
Target result: The soft matte eye reads evenly from straight ahead and every focal area remains visible with a relaxed gaze.
- Tool
- Clean blending brush and cotton swab for final corrections
- Product role
- no new product unless a specific gap remains
- Placement
- Only the edge or lash section that fails the final checkpoint; leave completed areas untouched
- Motion
- Light lifting or blending at one edge at a time, followed by a full open-eye recheck
- Amount
- No automatic final layer; use only the residue on a clean tool for corrections
- Working time
Why this works: Keeping no new product unless a specific gap remains at Only the edge or lash section that fails the final checkpoint; leave completed areas untouched directly supports this tutorial goal: create horizontal length on round eyes without a sharp graphic wing.
If it looks wrong: Build from between the outer lashes before extending.
View full-size image


Placement guide
Use the open-eye view as your working map.
The diagram is a map, not an anatomical template. Use the open-eye adjustments below when your eye shape changes what remains visible.
Elongated Eye Makeup for Round Eyes Placement Guide
Couture face chart mapping of shade placement, blend boundaries, and facial architecture. Hover or tap any card to spotlight its application area.
Step Palette & Targeted Placement
Harmonized formula and anatomical target- 1
Mid taupe
elongating transitionouter half and slightly beyond corner - 2
Soft bronze
lid dimensioncenter to outer lid - 3
Deep brown
lash depthouter upper and lower lashes
Pro Application Directives
- Begin elongation at the outer iris, not the inner corner.
- Keep the lower shadow on the outer third only.
- Blend the endpoint softly so the shape stays wearable.
💡 The numbered pins, anatomical diagrams, and written directives carry synchronized instructions. Click or hover any card to spotlight the exact region.
Final result checklist
Check the whole look before correcting any one detail.
- In straight-on light, mid taupe remains intentional at outer half and slightly beyond corner with no accidental hard border.
- Soft bronze is visible at center to outer lid without overpowering the soft matte finish.
- The feature described by Elongated Eye Makeup for Round Eyes stays balanced with both eyes open and the face relaxed, not only in a posed angle.
- No area in Elongated Eye Makeup for Round Eyes looks heavier because of repeated correction; remove excess before adding more color.
Make it work for you
Change placement, depth, or texture without losing the look.
Prominent eyes
Change: Use matte bronze instead of high shine on the center lid.
Why: A matte surface creates length without adding roundness.
Downturned round eyes
Change: Lift the endpoint before the natural corner drops.
Why: The outer line supports rather than follows the downturn.
Deep skin
Change: Use rich cocoa and copper-brown instead of pale taupe.
Why: Deeper neutrals keep the horizontal shape visible.
Common mistakes and fixes
Correct the result before adding more product.
The eye looks rounder
Likely cause: Dark color circles the entire lash line.
Fix: Remove inner lower shadow and focus definition from the outer iris outward.
The wing looks disconnected
Likely cause: The endpoint starts after a gap at the lash line.
Fix: Build from between the outer lashes before extending.
Both ends look heavy
Likely cause: The inner corner was darkened to match the outer corner.
Fix: Brighten the inner third and keep weight only at the outer edge.
Questions before you try it
Short answers to the decisions and failure points most likely to change this result.
Can I adapt Elongated Eye Makeup for Round Eyes for Prominent eyes?
Yes. Use matte bronze instead of high shine on the center lid. This works because a matte surface creates length without adding roundness.
What should I do if the eye looks rounder?
The likely cause is that dark color circles the entire lash line. Correct it now: Remove inner lower shadow and focus definition from the outer iris outward.
How do I keep Elongated Eye Makeup for Round Eyes within 25 minutes?
Prepare the tools first, protect the placement of Mid taupe, and stop once each visible checkpoint is true. Extra blending or full-face coverage is lower priority than the tutorial outcome.
Which product matters most for the soft matte result in Elongated Eye Makeup for Round Eyes?
Match the role and texture of smudgeable deep brown pencil before considering a brand. The correct placement and amount in the steps matter more than choosing a higher price tier.
Editorial transparency
How this tutorial was prepared
HueSteps structures tutorials around observable placement, motion, amount, and completion cues so readers can check their work at every stage.
Editorial method
The instructions describe product roles and visible application cues, not a requirement to buy a named item. Readers can use products they already own when the texture, shade depth, and function match. The current review is a same-team consistency check; HueSteps does not claim independent expert testing or first-hand wear testing.
Sources and further reading
- Elongated Eye Makeup for Round Eyes editorial method: placement cues, product-role wording, and correction boundaries
- Elongated Eye Makeup for Round Eyes AI image disclosure for progressive step visuals
- Eye Shape Makeup hub context for Elongated Eye Makeup for Round Eyes: Choose the placement change first
Related recipes
Continue with a nearby occasion, placement goal, or color decision.


